What is EM18 RFID READER
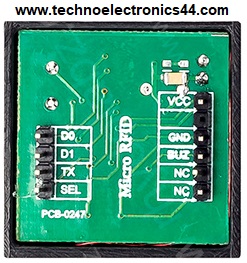
EM18 is the RFID Reader module, which is used to read the RFID card data.EM18 RFID reader operates with 125khz frequency and it has an inbuilt antenna.
Other devices: MFRC-522, PN532
 |
| EM-18 RFID READER |
 |
| EM18-RFID Reader |
EM18 RFID Reader Technical Specifications
|
Operating Voltage |
3.3v to 5v |
|
Operating frequency |
125Khz |
|
Size |
(32x32x8) mm |
|
Baud Rate |
9600bps |
|
Cards/Tags |
Cards /Tags which support 125Khz |
|
Reading distance |
10-15 cm |
|
Current Rating |
<50mA |
|
Communication |
TTL, WIEGAND |
|
Antenna |
Integrated |
|
Temperature |
0̊ to +80̊
C |
 |
| EM-18 RFID Reader |
 |
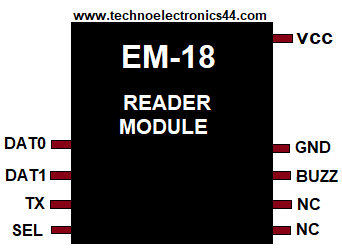
| RFID-Reader Pin Out |
EM18 RFID Reader Pin description
|
Vcc |
5v pin(positive) |
|
GND |
5v negative pin-GND |
|
BUZZ |
Connected to
Buzzer |
|
SEL |
1-RS232, 0-WEIGAND. |
|
NC |
No Connection |
|
NC |
No Connection |
|
Tx |
Data pin |
|
DATA0 |
WEIGAND interface
data LOW pin |
|
DATA1 |
WEIGAND interface
data HIGH pin |
How to use EM18 RFID Reader
EM18 Reader
operates in two different data modes TTL and WEIGAND, You have to select the
TTL format or WEIGAND format.
SEL- is
used to select RS232 or WEIGAND format.
SEL-LOGIC_0 - >
WEIGAND format
SEL-LOGIC_1
-> TTL Format/RS232
Next you
have to read the data from TX pin of EM18 using RFID Reader as shown below
EM18 Interface with Arduino
In this session, we have to discuss how to access the ID number from the RFID cards/Tags. For this purpose definitely, you need to interface with Microcontroller, here we are using an ARDUINO controller.
NOTE: RFID interface works with Serial communication (UART) protocol.
 |
| RFID-Arduino |
Hardware Interface
- Arduino
- RFID Reader
- RFID card
RFID Reader
has power supply pins, data pins.
Power
supply pins: 5v,
GND
Data
pins: Tx, Rx
- Vcc is connected to a 5v Arduino pin
- GND is connected to a GND pin of Arduino
- Tx is connected to 0(Rx) pin of Arduino
 |
| EM18 RFID READER-ARDUINO |
Code:
Operation
Note: RFID Card is independent of the RFID Reader, it means you can use either passive card or active card, the only difference is active card has a longer distance compared to the passive card.
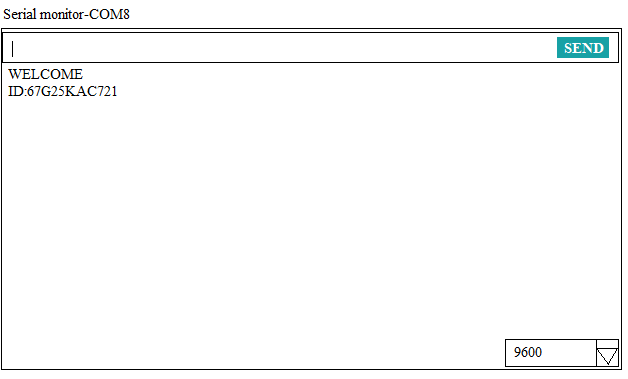
every RFID card has an ID number, we can read the ID number using the program as discussed above, using this sID number we can assign any name to that ID number using the program
so that when we access the programmed RFID card system will display the corresponding name.
OUTPUT
 |
| Arduino Serial monitor |
Applications
- Toll fee collection
- Access Control
- Asset Management
- Robotics
- Authentication
- E-Tickets
- E-Payments


0 Comments